 Pin
Pin
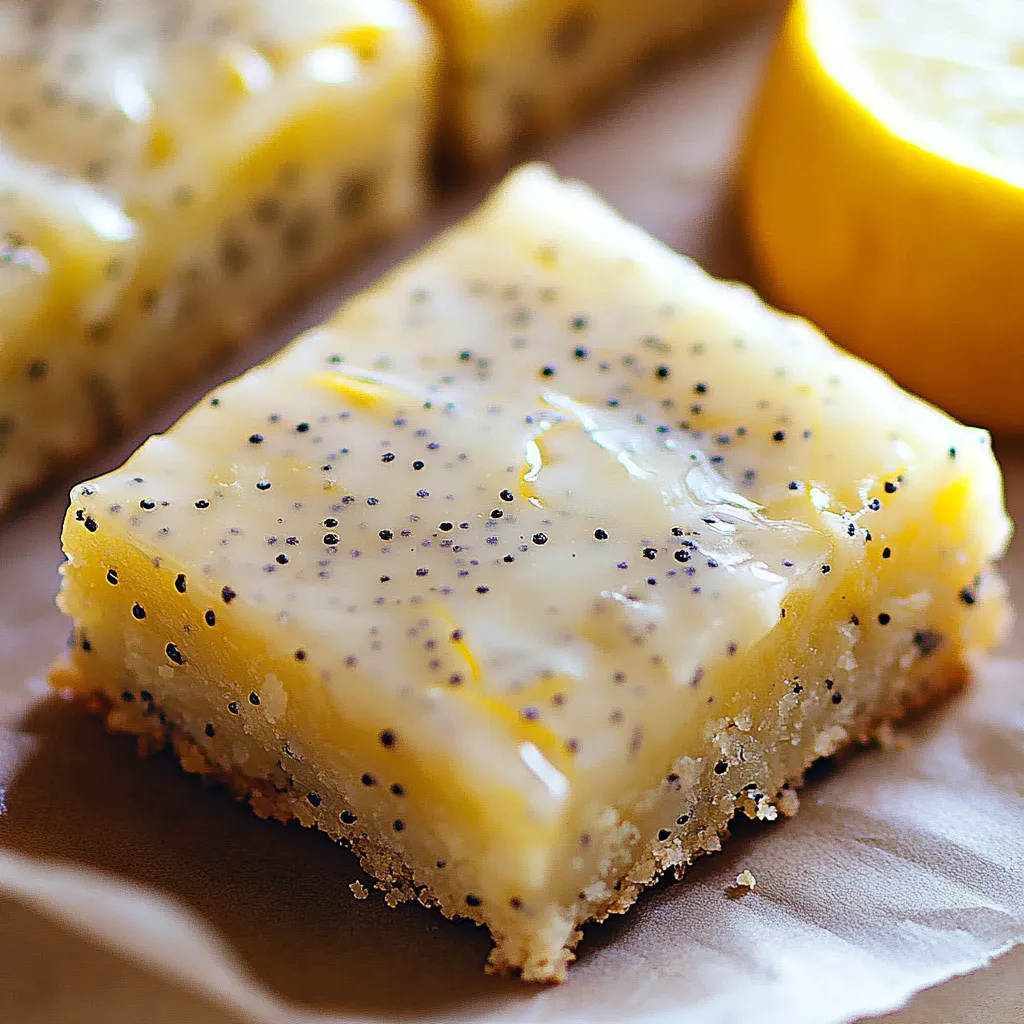
These melt-in-your-mouth lemon poppy seed bars deliver the perfect balance of tangy citrus and subtle sweetness, finished with a glossy lemon glaze that takes them to another level. The buttery, tender base studded with poppy seeds creates a delightful texture contrast that keeps you coming back for just one more bite.
I first made these bars for a spring brunch with friends, and they disappeared within minutes. Now they've become my signature contribution to family gatherings, with my cousin specifically requesting them for every holiday meal.
Ingredients
- Unsalted butter: provides richness and moisture
- Granulated sugar: creates the classic sweet base
- Brown sugar: adds depth and subtle caramel notes
- Large eggs: bind everything together
- Fresh lemon zest and juice: deliver bright authentic flavor
- Vanilla extract: balances the tartness of the lemon
- All purpose flour: provides structure
- Baking powder: gives just the right amount of lift
- Salt: enhances all the other flavors
- Poppy seeds: add that signature crunch and visual appeal
For the Glaze
- Powdered sugar: creates a smooth consistency
- Fresh lemon juice: adds tang
- Vanilla extract: rounds out the flavors
- Lemon zest: intensifies the citrus punch
Step-by-Step Instructions
- Preheat and Prep:
- Preheat your oven to 350°F and line your baking pan with parchment paper, allowing some overhang on the sides for easy removal later. The parchment prevents any sticking and makes cleanup much simpler.
- Mix Wet Ingredients:
- In a large bowl, whisk the melted butter with both sugars until completely smooth and slightly thickened, about 1 minute of vigorous whisking. Add the eggs one at a time, incorporating fully between additions. Then add the lemon zest, juice, and vanilla, whisking until the mixture looks uniform. The lemon juice might make the mixture look slightly curdled, but this is normal.
- Combine Dry Ingredients:
- In a separate bowl, thoroughly whisk the flour, baking powder, salt, and poppy seeds. Make sure the poppy seeds are evenly distributed throughout the dry mixture to prevent clumping in the final bars.
- Make the Batter:
- Add the dry ingredients to the wet mixture in three batches, folding gently with a spatula until just combined. Stop mixing as soon as no dry flour pockets remain. Overmixing will develop gluten and make your bars tough rather than tender.
- Bake the Bars:
- Pour the batter into your prepared pan, using a spatula to spread it evenly into the corners. Tap the pan gently on the counter a few times to release any air bubbles. Bake for 25 minutes, or until the edges are lightly golden and a toothpick inserted in the center comes out with just a few moist crumbs.
- Cool Completely:
- Allow the bars to cool in the pan for at least 1 hour before glazing. The residual heat from the pan will continue cooking the bars slightly, and proper cooling ensures the perfect texture.
- Prepare the Glaze:
- In a small bowl, whisk the powdered sugar, lemon juice, vanilla, and zest until completely smooth. The consistency should be thick but pourable, like honey. If it seems too thick, add a few drops of lemon juice. If too thin, add a bit more powdered sugar.
- Glaze and Set:
- Pour the glaze over the cooled bars, tilting the pan to help it spread evenly. For a more polished look, use an offset spatula to spread the glaze to the edges. Let the glaze set for about 15 minutes until it forms a slight crust on top.
The first time I made these bars, I accidentally doubled the lemon zest, and that happy mistake created such an incredible flavor that I kept it in the recipe. My daughter now helps me zest the lemons, carefully avoiding the bitter white pith, turning our baking sessions into cherished weekend traditions.
Make-Ahead Options
These lemon bars actually taste even better the day after baking, making them perfect for advance preparation. The flavors meld and intensify overnight, with the poppy seeds softening slightly while still maintaining their delightful crunch. If making more than a day ahead, wait to add the glaze until a few hours before serving for the freshest appearance.
Seasonal Variations
While classic lemon is perfect year-round, these bars adapt beautifully to seasonal citrus. Try Meyer lemons in winter for a sweeter, more floral profile. In summer, substitute lime for a tropical twist, or add a tablespoon of orange zest alongside the lemon for a more complex citrus flavor. During holiday seasons, a pinch of cardamom or cinnamon in the batter creates a festive spin.
Serving Suggestions
These versatile bars shine in multiple settings. For brunch, serve with fresh berries and a dollop of Greek yogurt. As an afternoon treat, pair with hot tea or coffee. For dessert, add a scoop of vanilla ice cream and extra lemon zest on top. They also make excellent gifts, stacked in a decorative tin with parchment between layers.
Storage Solutions
Store glazed bars in an airtight container at room temperature for up to 3 days. Place parchment paper between layers to prevent sticking. For longer storage, refrigerate for up to a week, though the texture is best when brought to room temperature before serving. Unglazed bars freeze exceptionally well for up to 3 months, wrapped tightly in plastic and foil.
Recipe Questions & Answers
- → How do I get tangier lemon flavor?
To boost the tanginess, add more lemon zest in the batter and glaze or increase the fresh lemon juice slightly.
- → Can I substitute the poppy seeds?
Yes, you can omit the poppy seeds or replace them with chia seeds for a similar texture and crunch.
- → How should I store the bars?
Store the bars in an airtight container at room temperature for up to 3 days or refrigerate for up to a week.
- → Can I make these bars ahead of time?
Yes, you can bake the bars a day ahead and glaze them when ready to serve for optimal freshness.
- → What pan size works best for this recipe?
A 9×13-inch baking pan is ideal for evenly baked bars. Ensure it is greased or lined with parchment paper before adding the batter.