 Pin
Pin
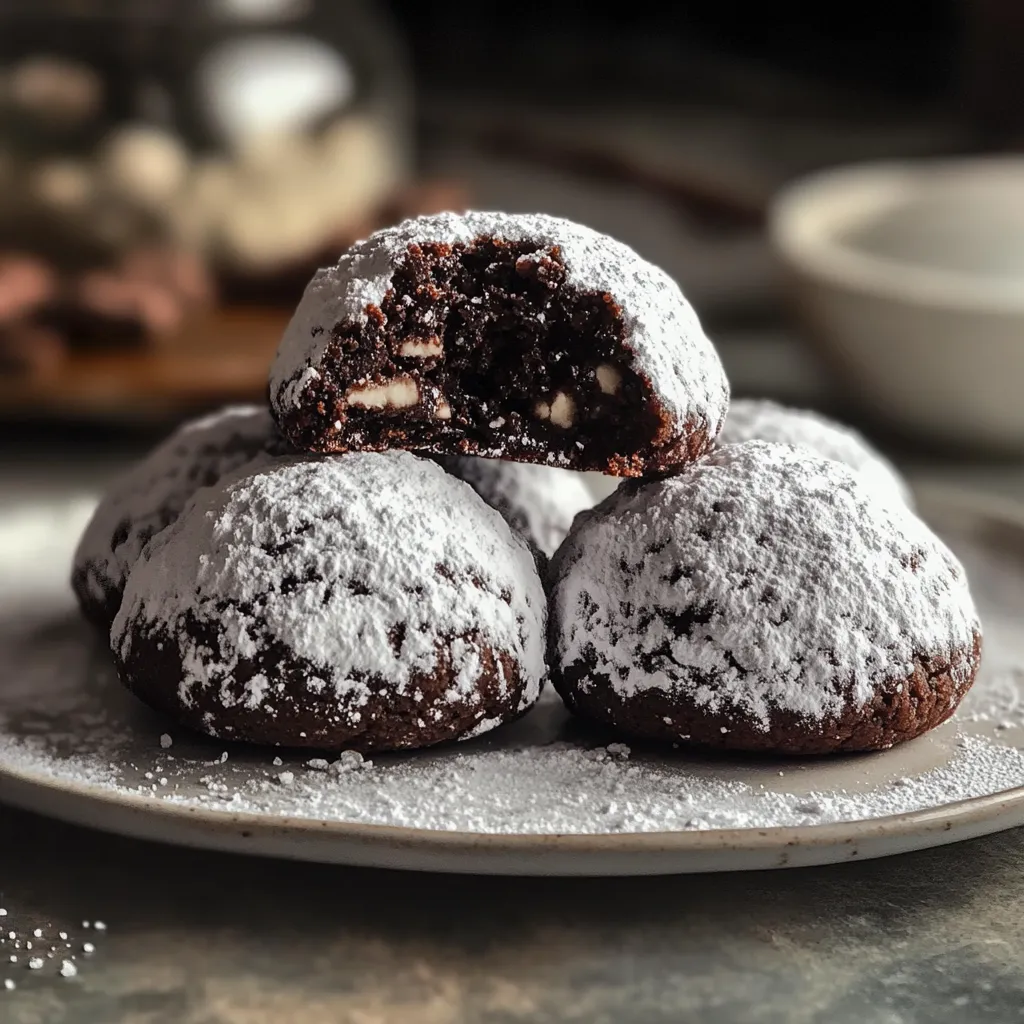
This rich and decadent chocolate snowball cookie recipe creates the perfect melt-in-your-mouth treat that looks as festive as it tastes. The double coating of powdered sugar creates that classic snowball appearance while the chocolatey interior provides a delightful contrast that chocolate lovers will adore.
I first made these for my daughter's winter birthday party, and they've become our signature holiday treat ever since. The way the powdered sugar creates that beautiful snowy effect never fails to bring smiles, especially when paired with hot cocoa on a cold evening.
Ingredients
- Unsalted butter: softened to room temperature ensures proper creaming and texture
- Powdered sugar: creates a tender, melt-in-your-mouth consistency both in the dough and coating
- Vanilla extract: adds warmth and depth to the chocolate flavor
- Salt: balances the sweetness and enhances the chocolate notes
- All-purpose flour: provides structure while keeping cookies tender
- Unsweetened cocoa powder: gives rich chocolate flavor without excess sweetness
- Chopped pecans or walnuts: add wonderful texture and nutty flavor
- Extra powdered sugar: for the double coating creates that perfect snowy exterior
Step-by-Step Instructions
- Preheat the Oven:
- Set your oven to 350°F and prepare your baking sheets with parchment or silicone mats. This temperature creates the perfect environment for the cookies to set without drying out or browning too much.
- Create the Base:
- Cream the softened butter and powdered sugar thoroughly for a full two minutes until the mixture becomes noticeably lighter in color and fluffy in texture. This process incorporates air that helps create the perfect melt-in-your-mouth texture.
- Add Flavor Elements:
- Mix in the vanilla extract and salt until fully incorporated. The vanilla provides depth while the salt enhances the chocolate flavor that comes next.
- Form the Dough:
- Gradually add the flour, cocoa powder, and nuts if using. Mix until just combined, being careful not to overmix which could make the cookies tough. The dough will be somewhat stiff but should hold together when pressed.
- Shape the Cookies:
- Scoop tablespoon portions of dough and roll between your palms to create smooth, uniform balls. Place them an inch apart on the prepared baking sheets as they spread only minimally during baking.
- Bake to Perfection:
- Bake for 10 to 12 minutes until the cookies are set but not browned. They may look slightly underdone but will continue to firm up as they cool. Setting a timer is crucial as even a minute too long can dry them out.
- First Sugar Coating:
- While still warm but not hot, roll each cookie in powdered sugar. The warmth helps the sugar adhere to the surface creating the base layer of "snow." Be gentle as they are still fragile at this stage.
- Final Snowy Finish:
- Once completely cooled, roll the cookies in powdered sugar again. This second coating creates that thick, snowy appearance that makes these cookies so distinctive and festive.
The cocoa powder is truly the star ingredient in these little gems. I use Dutch processed cocoa whenever possible for its deeper, richer flavor profile. My grandmother always said the quality of your cocoa makes all the difference in chocolate baking, and after years of making these cookies, I absolutely agree.
Storage Solutions
These snowball cookies stay fresh at room temperature in an airtight container for about a week. The flavor actually improves after a day or two as the ingredients meld together. If storing layers of cookies, place parchment paper between them to prevent the powdered sugar coating from getting compressed or smudged.
Creative Variations
While the classic recipe is perfect on its own, these cookies welcome creative twists. Try adding a teaspoon of instant espresso powder for a mocha version, or mix in mini chocolate chips for double chocolate delight. For a holiday twist, a quarter teaspoon of peppermint extract transforms them into chocolate mint snowballs that perfectly capture the winter season.
Serving Suggestions
Pair these cookies with hot chocolate for the ultimate winter treat. The rich chocolate cookie contrasts beautifully with the sweet powdered exterior, creating a perfect balance. They also make a stunning addition to holiday cookie platters where their snowy appearance stands out beautifully against other treats. For an elegant dessert, serve them alongside coffee after dinner.
Holiday Gifting
These cookies make wonderful homemade gifts because they maintain their quality for days and look impressively festive with minimal effort. Package them in clear cellophane bags tied with ribbon, or stack them in decorative tins lined with parchment paper. Include a handwritten recipe card for an extra thoughtful touch that allows recipients to recreate the magic.
Recipe Questions & Answers
- → Can I substitute nuts in the recipe?
Absolutely! You can omit the nuts entirely or replace them with seeds or dried fruit for a unique texture and flavor.
- → How do I prevent the cookies from spreading too much?
Chilling the dough before baking helps retain the shape of the cookies, ensuring they stay round and compact.
- → Can I make these cookies ahead of time?
Yes, these cookies store well in an airtight container at room temperature for up to 1 week or in the freezer for longer storage.
- → What can I add for extra flavor?
Add a teaspoon of instant coffee granules for a mocha twist or drizzle melted white chocolate over the cooled cookies for added sweetness.
- → Why coat the cookies in powdered sugar twice?
The first coating sticks to the warm cookies, while the second coat provides a thicker and snowier finish after they cool.